
Point-and-shoot cameras: 5 useful tips
For those that are unaware, I have an interest in photography and love to just take random shots when I see something that appears interesting. But unlike many avid photographers, I don't have a fancy digital SLR Camera, instead I have a normal point-and-shoot camera (Fuji Finepix J110w).
As with most point-and-shoot cameras you are quite limited to the number of settings you can play around with even if it is in manual mode. Unfortunately this means many "How to take an awesome photo" tutorials out there are quite useless since you can't follow their suggestions of increasing or decreasing the ISO, aperture, shutter speed, exposure etc.
However, all is not lost as you can definitely still take awesome photos with your humble camera. Here are five tips that I find work quite well for me, if you have your own technique/tips I would be very interested to hear them :)
1. No Flash!
This might be a personal preference, but I find when you use flash when taking the photo in a dark/dim place, the light from the flash is usually too strong which makes the whole photo look artificial. The simplest solution is to try and brighten up the place - turn on a light, open the curtains etc. Lighting is quite important in taking a good photo, so the more flexible you can be with your lighting the better.
Another alternative is to cover your camera's flash with a piece of paper/tissue. This somewhat subdues the flash while still providing a source of light. I've only tried this a couple of times and overall it worked quite well. Of course, you can always take two photos, one with the flash and one without - that way you will have both alternatives and you can pick the best one.
Having said all that, there are always exceptions when using flash and as weird as it may sound, using flash outdoors (where it is nice and bright) can often give you better photos - it lights up your subject just enough to make them clear, but since the surrounding is bright as well the flash doesn't stand out like a sore thumb.
2. Use the timer
This may seem like a weird tip, but the timer on your camera is truly your friend. One problem I find with my camera is it is very easy to accidentally take blurred photos, if there isn't enough lighting any slight movement will cause the photo to be blurred. This is where the timer comes to your rescue!
If possible find somewhere to place your camera: desk, chair, bench, ledge, ground, anything...just don't drop your camera! Put the timer on, press the shutter-release button (the button to take the photo), wait to see the countdown start and move your hands away from the camera. This way, you are not touching the camera at all when it takes the photo. The reason for timer+moving hands away is you know for sure when the camera takes the photo there is no motion at all, not even the slightest of nudges from you pressing the button.
If you can't put the camera on a stable surface, this trick can still semi-work. Same drill, except after you press the shutter-release button, wait till the countdown gets to about 1 second or so left and hold your breath while the camera takes the photo. I find holding your breath helps a tiny bit in not moving - don't ask me why...
3. Night photos
Probably one of the hardest times to take a nice photo with a normal point-and-shoot camera is at night, especially outdoors since you can't just flick the light on. I've found to take decent photos at night you really need to just place your camera on a stable surface, use the timer (see Tip 2) and have a longer exposure.
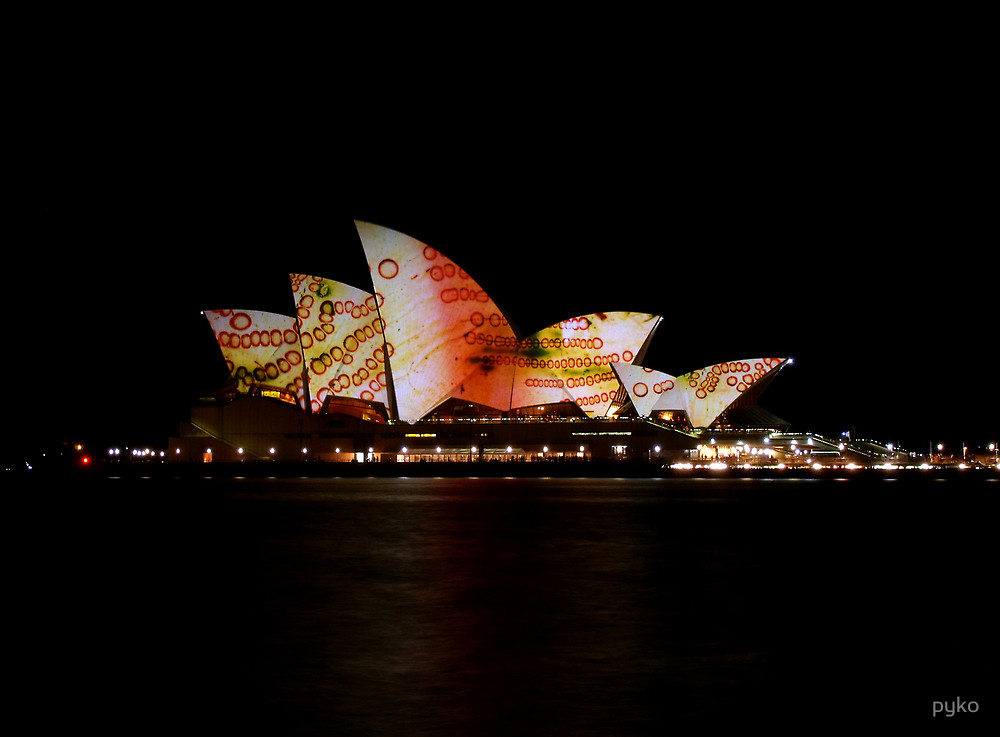
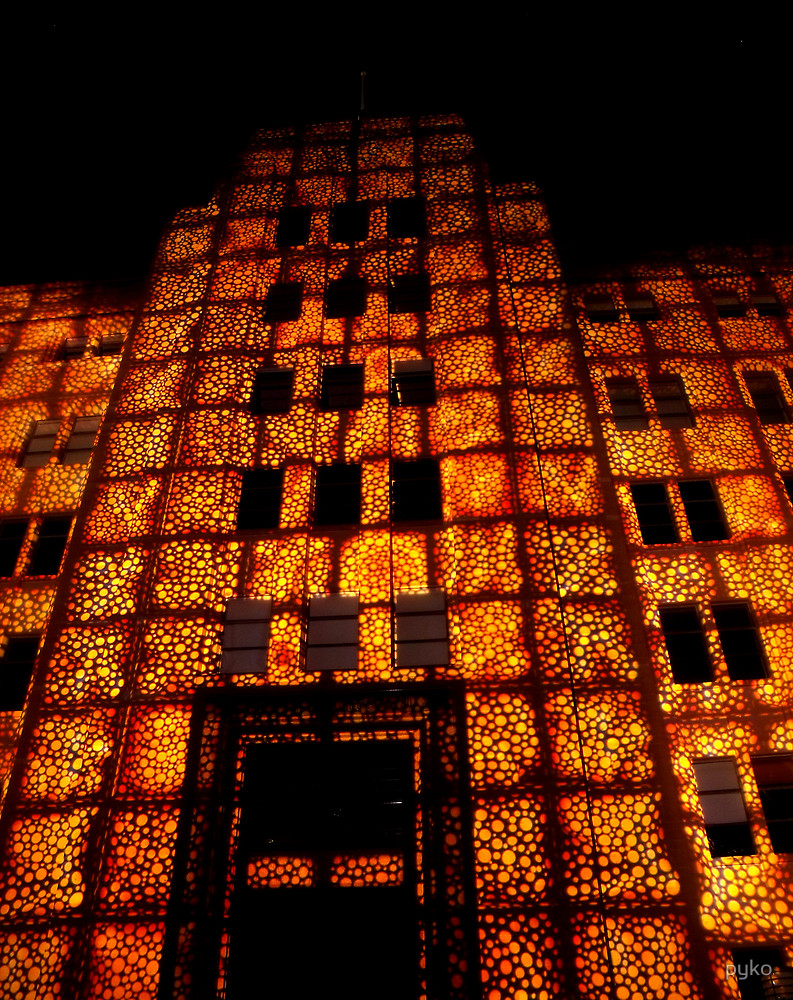
How do you change the exposure I hear you ask. Well, most modern point-and-shoot cameras have preset Scenes or Modes (eg. portrait, night, fireworks etc). Anything that is for night/dark conditions will generally have slower shutter speeds, which means longer exposure time, which means your camera will "soak up" more surrounding light and give you a sharper/clearer photo. Since your camera will sit there for a couple of seconds "soaking up" the surrounding light you need to make sure that your camera does not move at all - thus the timer trick. You may have to play around with the different night modes on your camera to get something nice. The photo of the Sydney Opera House (above) and The Museum of Contemporary Art (right) were both taken using my point-and-shoot camera set on "Fireworks" mode with the slowest shutter speed possible (The normal night mode just didn't let in enough light resulting the photos being quite dark).
4. Focus and trick your camera
Every now and then you might want to trick your camera into letting in more or less light than what it would automatically do. For all digital camera's I've seen/used, when you half press the shutter-release button the camera will focus on the frame you have chosen - generally there will be some sort of feedback that it has found the focus (maybe something displayed on the screen or a beep).
Once the camera has found the focus, it will calculate all the required settings for that particular frame. Relying on this, if you want your camera to soak up more light, first focus (half press the button) on something darker than your subject (preferably similar distance away), then move your camera back to what you really want to take, then take the shot.
This works because when you initially focus on something darker, your camera will think it will need bit more light to take a clear shot, so when you go back to your intended subject (which is brighter than the initially focused subject) your camera will let in more light than usual since it still has the "let in more light for dark object" setting from your initial focus.
5. Lower your megapixel
This may sound like an odd tip, but lowering the number of megapixels you use to take the photo may help in giving you clearer photos. The technical details behind this is quite confusing, but generally a point-and-shoot camera won't have a great sensor (one of the important components in the camera needed to take clear photos), so the higher the megapixels, the more noise you'll get. You probably don't need anything more than 5MP as that will be more than enough to print out the standard 4"x6" photos (in fact you only need 3MP to do that).
Edit: Came across this post by David Pogue about Photography Tips and Tricks - I'm keen to give Tip #2 a go!